Skip to content

Quick-Start Guide

5-Minute Setup

This quick-start guide will show you how to turn a completely empty Teacher Account into a rich, online-learning environment for your English students. Ideas, activities and instructions are available for the different game layouts you will find in the classroom. These can be found on the resources page under the Frame Info category.

Setting up your classes on My Teachnology:

Student Onboarding

All students who will be joining your online classes must be added to your roster. This is done by inviting them from your dashboard. An email invitation will be sent to each student. After accepting, they will be able to join your lessons.

The following 3 steps need to be completed for each new student you add.

1. Log In

Before anything else, you must be logged in. Once logged in, you will have access to the most important areas: Launchpad, Dashboard, and Word Warehouse.

2. Add Students

Go to the Students section of your dashboard enter their Name and Email to send an invitation. This must be same email address they will log in with and can't be changed.

3. Accept Invitation (Student Action)

Students must register for My Teachnology using the email address you invited them with. They will be able to visit the Student Zone to accept your request. Students never need to purchase any product, only Register (for free).

Class Creation

Classes allow you to manage groups of students instead of treating them all individually. You assign learning goals and manage access to your online lessons by grouping them together into these classes. 

The following 4 steps need to be completed for each new class you create.

1. Create a Class

Go to the Classes section of your dashboard enter a Class Name and Description. This name will be public to you and your students.

2. Enroll students

From the Classes section of your dashboard, add your confirmed student to the class using the dropdown. New students can be added at any time.

3. Add Learning Goals

Go to the Goals section of your dashboard and create specific English Goals the students in your class will work towards. You will be able to add feedback based on these goals.

4. Create a Lesson

Go to the Lessons section of your dashboard and create an English Lesson. Lessons are how you choose and organize your learning content (Goals, Vocab, Images, and Texts) for each online session.

Lesson Management

To add content to a lesson, you first need to save it to your library. This allows you to edit all content freely and save personalized versions of it. Once in your library, you will be able to add vocab, images, texts and specific learning goals to each lesson. 

The following 4 steps need to be completed for each new lesson you add.

1. Add your Content

Add pre-made content packs to your library from the Word Warehouse. These can also be directly added to a lesson. All content added to your library can be edited, assigned and reused freely between all your lessons. You can also add your own Vocab / Images / Texts at any time.

2. Fill Your Lessons

Once added to your library, you can freely assign any content to any lesson. You can see an overview of lesson content by clicking on an existing lesson, as well as remove it. You should also choose some target learning goals so you can leave feedback for it.

3. Start Your Class

You start an online session from the Launchpad. After you choose the lesson from the dropdown, you can either start a new session or continue your previous session. Click Create New to begin.

Managing a Session

Once your session has loaded, choose Interactive Activities to see the different layouts you can use. This is where you and your students can interact with the lesson content at the same time. All students have a different color cursor (the student’s will  be named). Some layout options are only available to the teacher, including:

  • Locking/Unlocking the class
  • Using the Feedback menu
  • Pausing/Unpausing Inputs
  • Specific Layout options


The following 4 steps need to be completed for each new session you start.

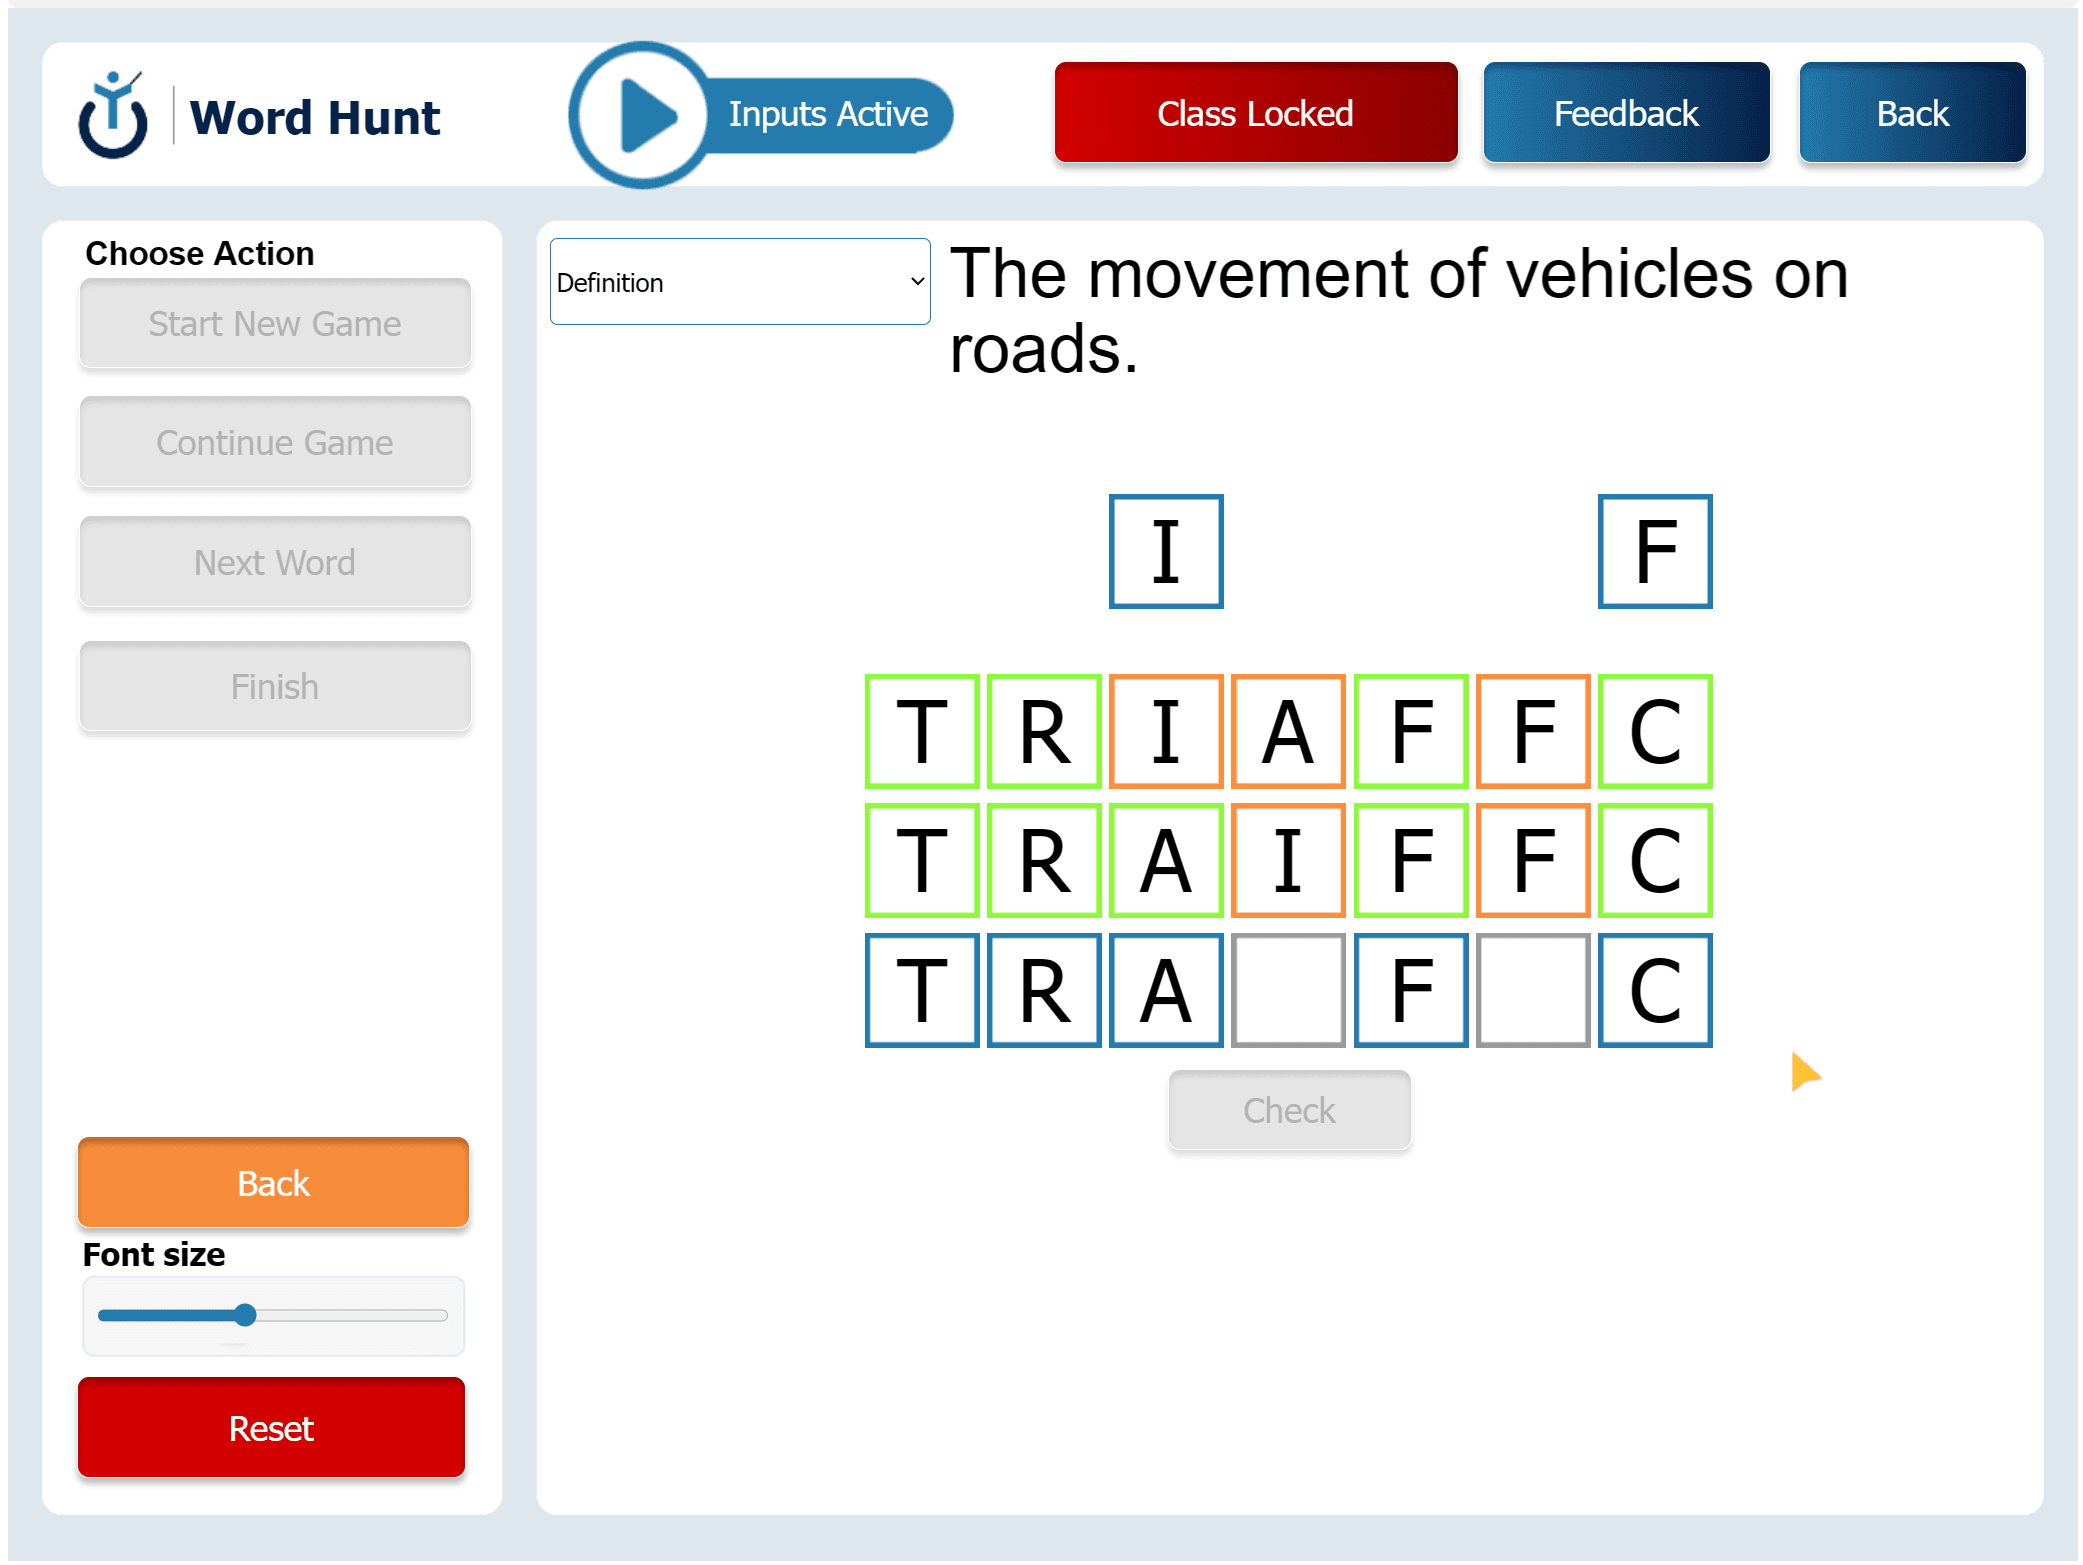
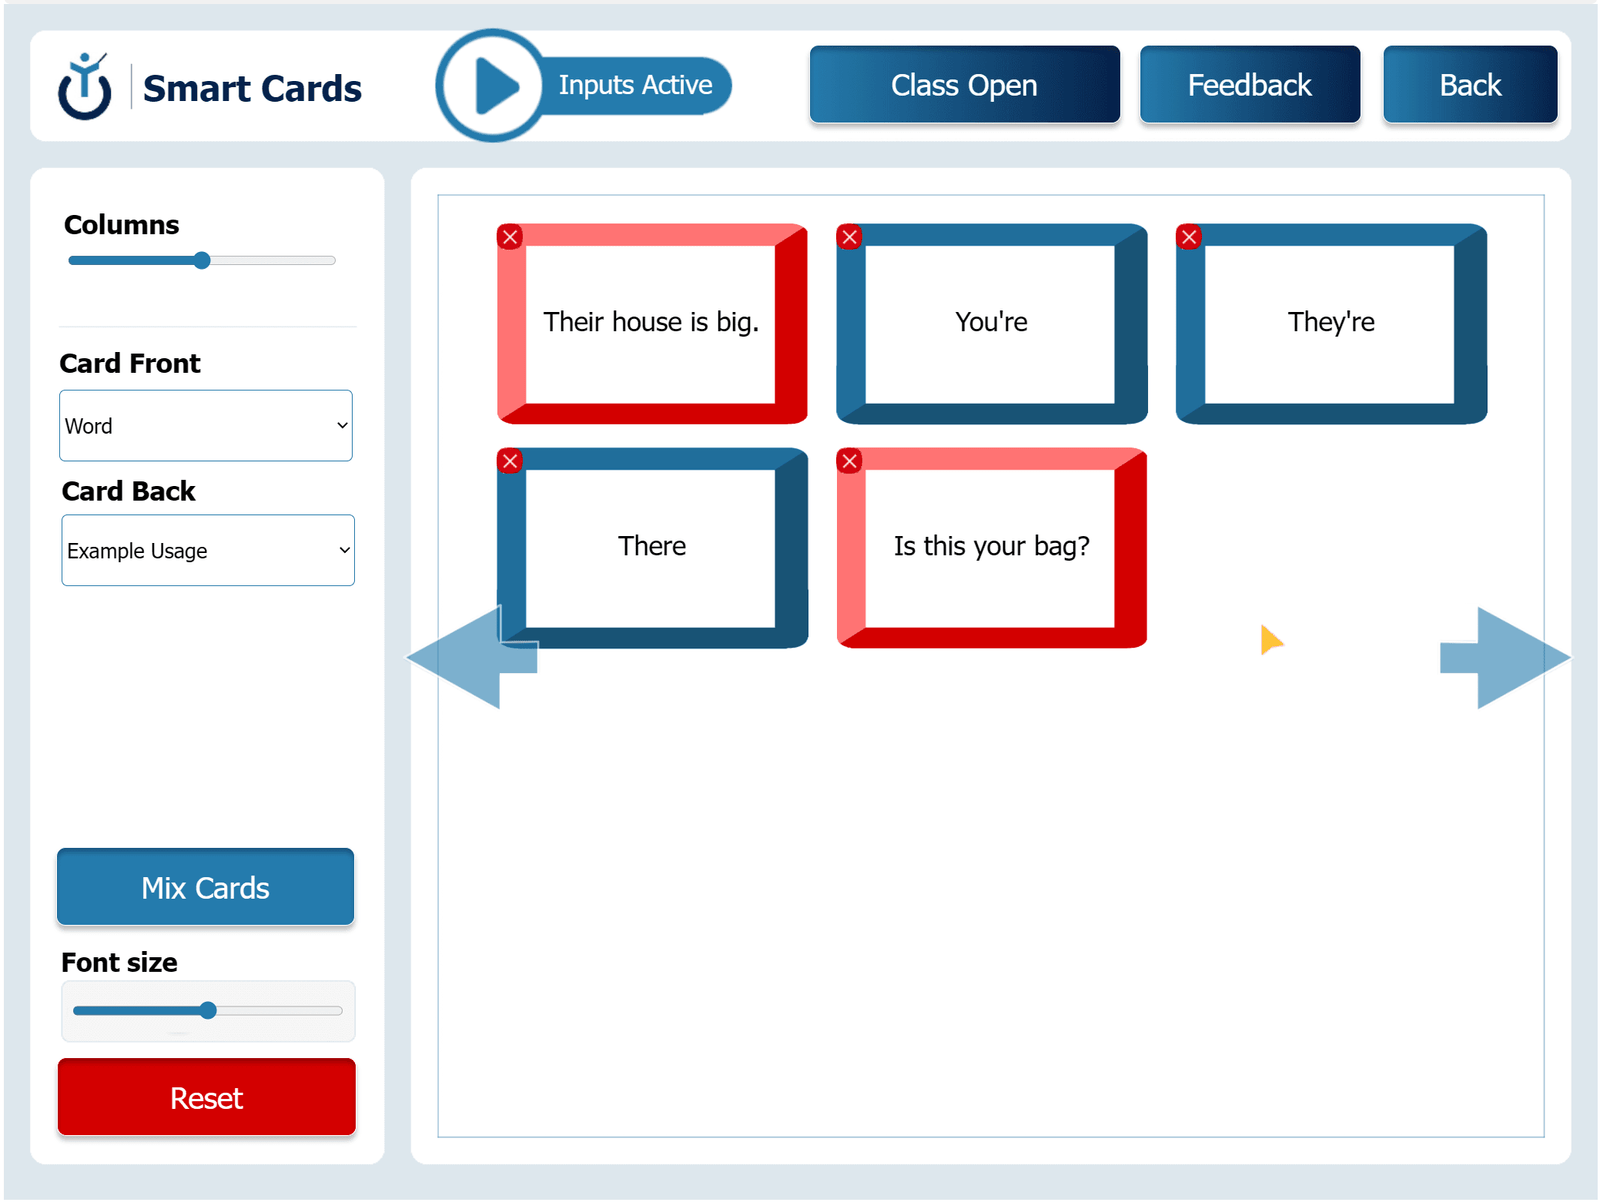
1. Choose Layout Type

Once you launch Frames, choose Interactive Activities. The blue buttons will load the different layouts for use with students. The two green buttons are for editing content mid-session:
Word Refiner for vocabulary entries
Text Tuner for paragraph entries

2. Unlock the Classroom

When you are ready, click the red "Class Locked" button at the top to unlock the session, allowing students to join. It can be discovered for up to 1 hour after the class is unlocked. Starting any new session for any class will close access to all your other sessions.

3. Join the Class (Student Action)

Students join from the Student Zone under the Classroom tab. They can play a game while they wait, and will receive an alert only after you have unlocked the classroom. If they loaded the Student Zone after you have already opened the class, they will see a simple Go To Class button to click.

4. User Management

There is an orange pause/resume input button that will allow the teacher to prevent inputs from the whole class. If a user leaves the class (including the teacher), they can load back in at any point. However, no student will be allowed into the class without the teacher active inside of it.

More Guides

Frame: Word Hunt

Word Hunt helps students practice vocabulary by guessing a word from a group of letters. They drag the letters to spell the correct word. At

Frame: Sentence Mapper

Sentence Mapper helps students understand grammar, meaning, and structure by moving sentences into different categories. The teacher loads a paragraph or a list of sentences.

Frame: Text Tuner

In this flexible Frame, teachers can adjust and customize paragraphs or passages to better align with lesson objectives and student needs. Text Tuner allows teachers

Frame 8: Word Refiner

In this versatile Frame, teachers have the tools to customize and refine vocabulary content for their students. Word Refiner allows teachers to edit definitions, add

Frame: Smart Cards

In Smart Cards, students use digital flashcards to learn and review vocabulary. Each card shows useful information like the word, its meaning, example sentence, related

Frame: Sentence Lab

In Sentence Lab, students practice writing their own sentences using new vocabulary. They choose a word from the list and write a sentence that shows

More Guides

Frame: Word Hunt

Word Hunt helps students practice vocabulary by guessing a word from a group of letters. They drag the letters to spell the correct word. At

Frame: Sentence Mapper

Sentence Mapper helps students understand grammar, meaning, and structure by moving sentences into different categories. The teacher loads a paragraph or a list of sentences.

Frame: Text Tuner

In this flexible Frame, teachers can adjust and customize paragraphs or passages to better align with lesson objectives and student needs. Text Tuner allows teachers

Frame 8: Word Refiner

In this versatile Frame, teachers have the tools to customize and refine vocabulary content for their students. Word Refiner allows teachers to edit definitions, add